This page will help you get started in the fine art of bridle making. The first section discusses the various parts of a bridle and how modern ones differ from SCA period ones. The second part will show different bridles in process, so you can follow the steps and make one yourself, and the last part is a pictorial summary of bridles from paintings of the SCA's period.
If you already know the various parts of a bridle and how they work, read on, if not, this website offers a good introduction to the various parts and their fitting.
University of Missouri Extension article on Bridles
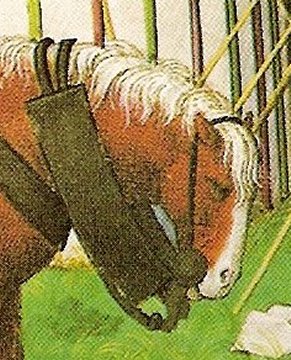
Above is a photo of my horse October Dawn (Toby) wearing a modern English bridle. It has a noseband or caveson, a throat latch, a brow band, and cheek and crown pieces. It is all held together with sewing and various buckles. I have a D-ring Myler bit on it. 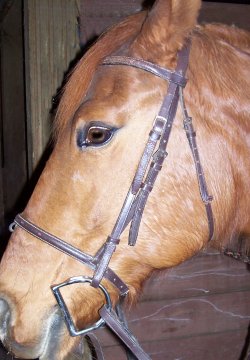
This bridle is a fairly standard English style bridle. At first glance it looks quite like many SCA period bridles.
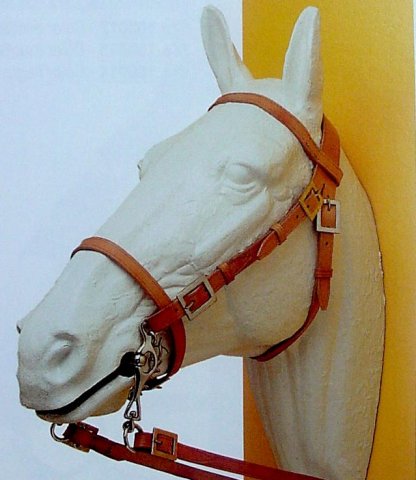
On closer look though, you will find that the noseband on a period bridle is fixed to the bridle, similar to this modern spanish bridle:
In many respects, period bridles also look like modern western bridles.
The first western bridle has the bit and reins attached with laces. A very period method. 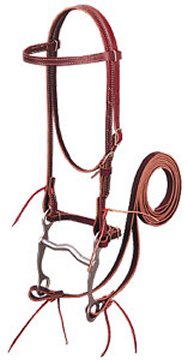

The second is heavily decorated with scallops and stars. Pierced-work pewter stars are period!
To the modern eye, Western bridles look more "medieval" than English ones. This is generally due to the decoration used. Structurally, modern Western and English bridles are quite similar. If you look past the differences of types of leather and the conchos, or raised brow and nosebands, you will find that modern bridles are cut in a very similar way, and that they are significantly different from many "medieval" ones.
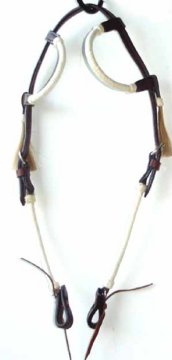
Western bridles may also have an "ear" style and these are similar in some ways to certain period bridles
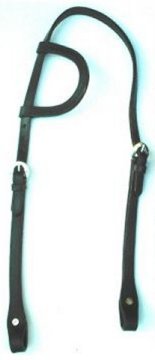
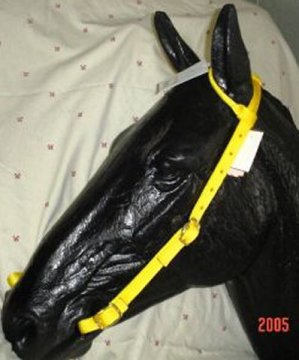
One of the simplest modern methods of making one and two ear bridles is to cut a slot in the crown piece and to slip the slot over the ears.
Below is a modern bridle constructed in this way. The slot takes the form of an oval hole, but I have seen simple slots used also.
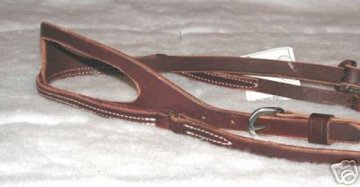
I think that this may be the way this bridle is constructed.
Note the period bridle also has a browband, a feature not seen in modern western "eared" bridles.
Note also, that the bridles in the period painting are put together in a different way from the modern bridles. They appear to have the browband, the throatlatch, the crown, and the cheeks all conjuncting at the rosette. Sometimes, instead of a rosette, this appears to be a ring and each piece attaches to it with a hooked strap end. (see the Bamberg Rider in the 3rd section)
The other major difference between modern bridles and period ones is that there are no buckles connecting the cheek pieces to the crown piece. The crown and cheeks are all one piece from the bit over the poll and to the bit again, or they attach at the rosette with no visible buckle.
This works just fine if you have a separate bridle for each horse, as there is no need for size adjustment. However, if you swap bridles between horses, you will find that lack of adjustment to be inconvenient.
Not to worry, you will find in this article that making a bridle to fit each horse is easy and not very expensive, so you can have several for each horse if you like.
Getting started on making a bridle
Every horse is different in size and how a bridle fits them varies as well. Better quality bridles are sized to fit your horse and you can special order parts to fit, if you know how to measure.
Also when you change bits, the bridle will need to be adjusted accordingly, as bits have different sized rings and cheek pieces.
The first bridle that I make in this tutorial will be the simplest modern sort, a plain bridle with a browband and no noseband, then we'll make a version one of the more common types of period bridle. After that we will explore some ways to make any bridle more interesting and perhaps more specific to your period.
Do you have a bridle that already fits your horse? You can measure that to start, if not you will need a bridle or a horse to measure. If you have no horse to measure, the various parts of Toby's bridle are shown below with their measurements. Toby is an appaloosa-quarter horse cross and is 15 hands. I consider her to be an average sized horse. She is certainly a really good size for a period warhorse. Unless you are likely to be trying to outfit warmbloods or drafts, her bridle would be a good starting place.
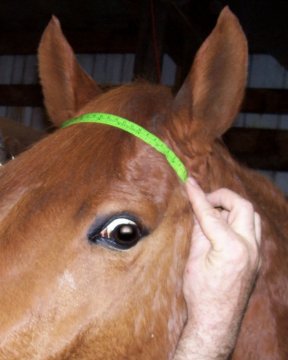
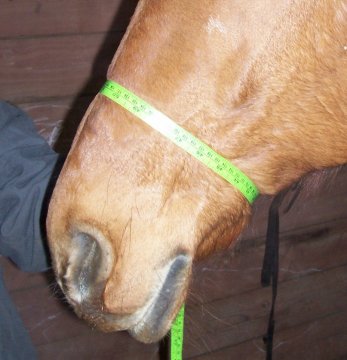
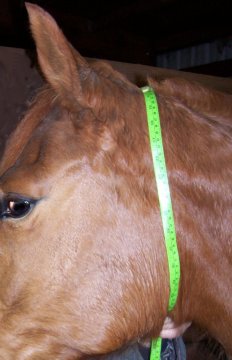
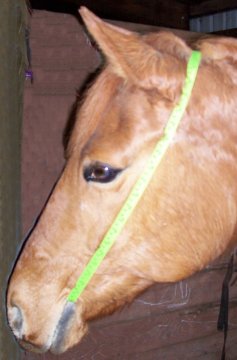
The following pictures show my horse Toby being measured for a bridle and then I will show the measurements of her modern bridle.
Here is an example with a tape measure in the place you will measure for a browband. On a modern bridle this goes across the forehead under the ears to just a bit behind the ears on each side. One basic rule to remember:
"Measure twice cut once!"
The place you measure for a noseband is anywhere from a finger's width below the protruding bone on the cheek to right above the bit. Different styles of nosebands sit in different places.
The measurement for the throatlatch is around the neck just behind the ears. Be sure to leave several fingers width of space inside the tape for ease.(not shown) This ease appears to be a modern convention though. Paintings of period bridles show the throatlatch quite tight. Did they actually use tight throatlatches or was this an "artistic license"? At this point, there is no way of knowing.
Here I am showing the measurement from the corner of Toby's mouth over her poll to the other side. Depending on the bit you use, this measurement will change, but the corner of the mouth is a good starting place, and you won't be too short.
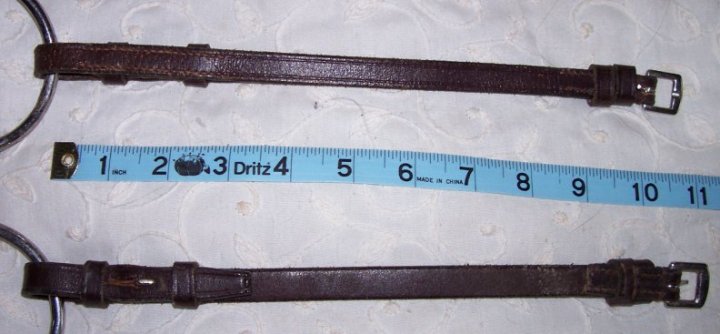
Parts of a bridle and the measurements of Toby's bridle:
Throatlatch (also called throatlash)

Note that the crownpiece and throatlatch are cut from the same strip of leather and left attached across the poll.
Cheek pieces
The cheek pieces attached to the bit.
Brow band

Front and side views of a browband.
Noseband (the noseband and its strap together are called a caveson) I'm not going to make a noseband in this tutorial, but I include it for the sake of completeness.
Crown piece 
Views of each end of the noseband. Note the head strap attached to it.

The two ends of the crown piece. Showing the throatlatch attached.
Basic materials you will need:
Leather, approximately 8-10 oz tooling or latigo.
I'm using tooling leather. You can stamp, paint or dye tooling leather. Latigo is oil impregnated and generally either dark burgandy or black in color. It does not stamp or color well, but since it is already "finished" it doesn't need to treated in any way.
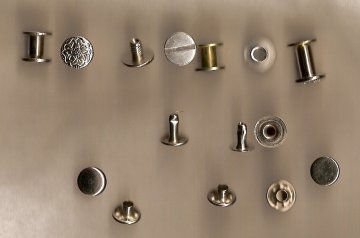
8 Rivets and 4 chicago screws
Various chicago screws and two piece leather rivets.
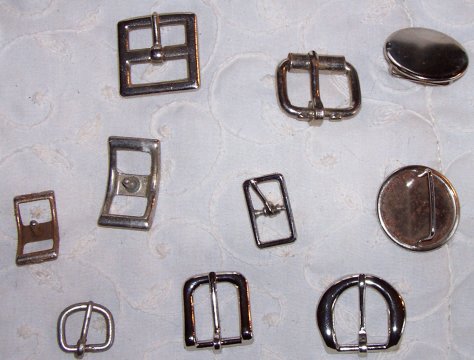
Buckles, two 3/4" wide and one 1/2" wide
Various buckles available at leather stores. These aren't so modern as to be jarring. In the upper right are a pair of plain bridle rosettes.
Tools needed:
Hammer and rivet setter
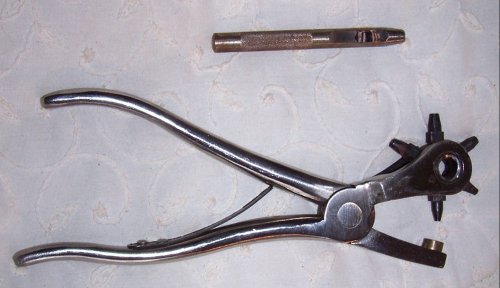
Hole punch
A photo of two common types of hole punches.
Leather cutting scissors
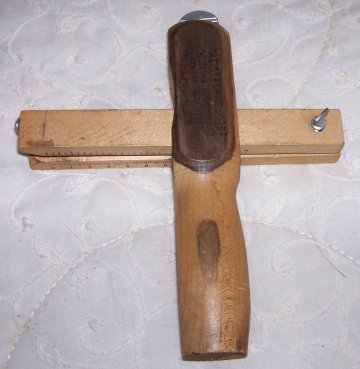
Leather strap cutter
A good strapcutter. Mine has been used a lot and is rather battered.
Things you might like to have:
Strap end cutter(s)
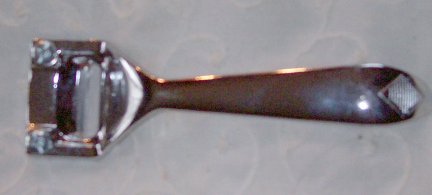
Skiver
A skiver. This is fairly easy to learn to use. It has a blade in the slot and you guide it over the back side of the leather to thin the leather.
Head knife
The head knife is also used for skiving and for cutting. It is an all around useful knife. I've never gotten around to getting one though.
Strap ends, ornamental metal keepers
Conchos
Brass, silver, or pewter studs, bosses or spangles
Metal bridle rosettes
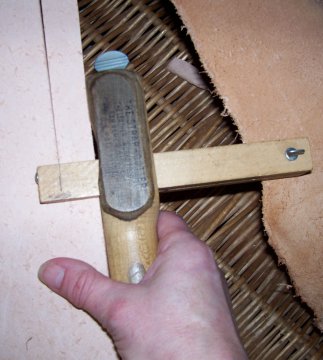
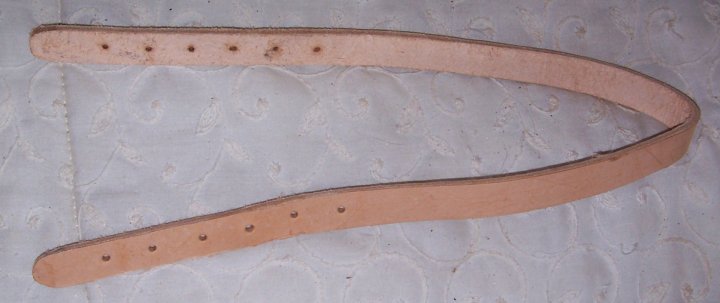
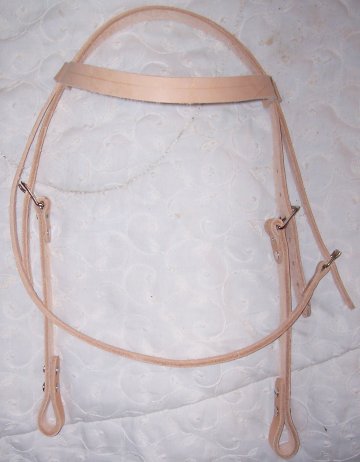
Cut or purchase 3/4" wide strip and 1/2" wide strip.
The strap cutter in use.
You can buy straps already cut from most leather stores. They are sold as belt blanks and will cost you a pretty penny. It is cheaper by far to purchase a strap cutter and a side of leather and cut your own. If you are sure you are never going to make another leather project, go ahead and buy the straps pre-cut, but if you are like me, one project leads to another and then you have a house full of stuff waiting to be made. (next week we'll work on saddles)
Measure and cut from the 3/4" strip:
Brow band. Measure your leather to length including the 2.5 inches on each end. Skive each end a bit (if desired) to taper them so the fit is tidy and attractive. Trim if necessary.
Fold the ends in 2.5 inches and mark the places you want holes. You can use two rivets side by side or lengthwise. Punch holes and install rivets.
The browband edge and front views
Crown piece. Measure your strap to length, round the ends and punch holes. This will buckle to the cheek pieces.
The crown piece showing the holes and ends.
Cheek pieces
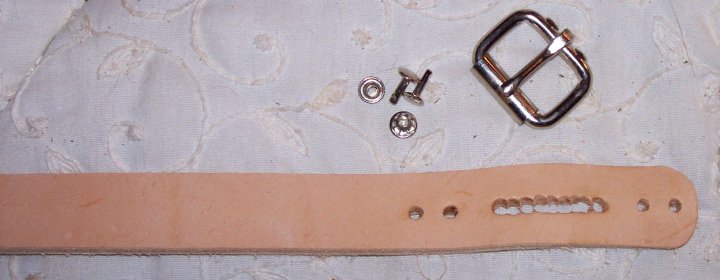
Chicago screws for the bit ends, regular buckles and keepers for the top ends. Punch the holes for the tang of the buckle, This one needs to be rectangular. You can buy special long oval punches or just punch a row of small holes with your regular hand punch. Skive the buckle end of the strap to taper it. Fold over a bit more than one inch, mark and punch holes. Install rivets. Fold up bit end. Do not skive this end. Mark and punch holes and install chicago screws.
The cheek pieces showing the front and edges
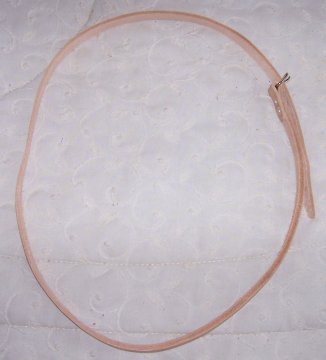
Throat latch
Skive one end to thin it a bit (if desired), punch long oval hole as above for buckle tang and attach buckle using rivets.
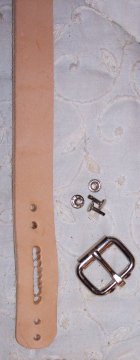
The throatlatch
Keepers are nice to hold down the loose ends of straps. They are not very period though. I haven't evidence of them in paintings and the Museum of London book on Dress Accessories noted that they hadn't found any on any of the belts that they had found. But then, this bridle isn't very period either!
To make leather keepers:
Cut a strip of your leather 3/8" wide and then cut pieces that are, in length, twice the width and 6 times the thickness of your bridle strap.
Fold into a circle with the two ends flush together. If you like, you can put a dab of leather(or white) glue in there to help it stay together. Thread a glover's needle and sew two or three stitches between the ends, drawing them nice and tight. Tie off ends of thread. Dampen the leather and form it in your fingers into a rectangle. Set aside till dry. You will need at least one for each cheek piece possibly two, and one or two for the throatlatch.
Slide the keepers (if desired) onto the cheek pieces and the throatlatch so they are in position to hold down the ends past the buckle.
You can also use a lace to tie down the ends just wrap it around the strap and end and tie it into a knot.
In addition, you can purchase leather keepers ready made, though your choice of sizes will be limited.
Assemble the bridle:
Thread the crown piece through the loops of the browband. Repeat with the throatlatch.
Attach the bit to the cheek pieces with the chicago screws.
Buckle the cheek pieces to the crown piece.
Your bridle is finished!
If you like, you can decorate it with dye or paint, tool it or stamp it with decorative stamps, or attach decorative rivets, conchos or jewels.
Now we will make a much more period style of bridle that just happens to be even easier to make than the one above!
For this one you will need two straps. I've used one 52" long and the other 44" long. These are Toby's measurements, yours will vary. The straps I am using are one inch wide. You can make them pretty much any width you like, as long as you can fit them into the rings.
You will also need:
One buckle the width of one strap
Two rings. Solid rings, ones that are either cast or have the seam welded, are stronger. The diameter will depend on how wide your straps are. I've used 2" ones. My local leather store, Oregon Leather has a nice selection.
Thin leather for lacing the bit onto the bridle.
Getting started:
Cut your straps if you haven't already done so.
Trim them to length. I like to round the ends, but it isn't necessary.
Punch 4 holes in each end of the 44" long strap, as shown below:
Note I have used a slightly larger punch for the two inner holes.
This will be your crown and cheek piece strap, and you will lace the bit to the ends.
You can purchase leather lace ready made or make your own.
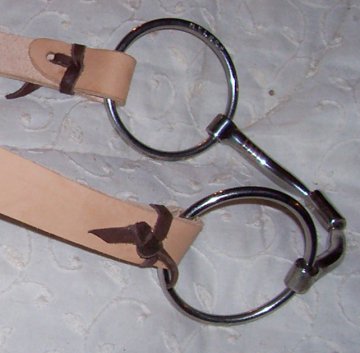
I used a dark brown, flexible, stretchy leather for the lace. I just cut a piece about 5/16" wide with scissors. I trimmed one end into a point so I could get it through the holes. Fold the strap end around the ring of the bit, and hold the holes aligned. From the "outside" put the lace through the top hole and back out through the bottom one. Now wrap the lace around the edge and go through the hole from the "inside" back to the "outside". Wrap the lace around the other side and back through the hole again. You will have gone through the same hole three times. Tie the two lace ends into a knot and trim the ends.
When I remove the bit, I just cut the lace and put in a new one when I replace it.
Attach the buckle to one end of the other strap. You can use rivets, chicago screws, sew it in or lace it in as you did the bit. This strap will be both the browband and the throatlatch!
In this case I chose to use rivets as they are very fast to do.
The finished browband and throatlatch in one.
Generally, I prefer to stitch leather rather than using rivets or chicago screws. It looks nice, and most people think it is difficult to do and therefore looks more "expensive". Learning to sew leather is really quite easy. There are plenty of books that will help you out on this, possibly the easiest method is to purchase Tandy's basic leather sewing kit, or some other similar package, and the book "The Art of Hand Sewing Leather", these are available online at www.tandyleather.com or at Tandy and Leather Factory stores. These, or similar, are probably available at other local leather stores, and I do encourage folks to shop locally if they can. Check your phone book. Support your local businesses.
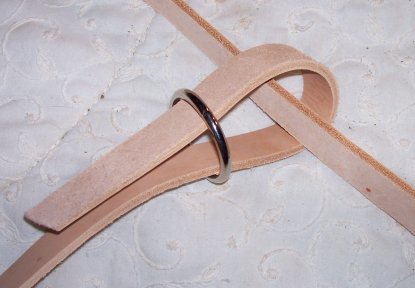
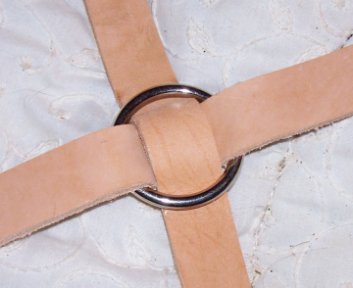
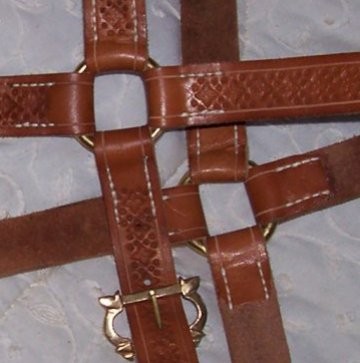
"Weave" the straps through the rings and adjust the rings into position, approximately where the rosettes would go on a modern bridle.
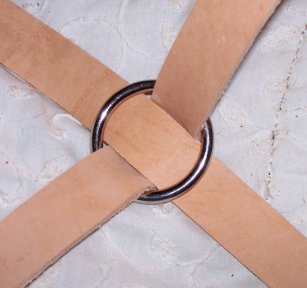
Once you have the rings in position and adjusted where you want them, you can just use the bridle and eventually it will "relax" into its final position. If you want though, you can dampen the leather. When tooling leather is dampened, it becomes very stretchy and flexible and you can form it into pretty much any shape you want it to take. Other types of leather will differ in how much flexibility you will get. But all will form to shape over time.
Punch holes in the throatlatch so you can buckle it around the horse's neck.
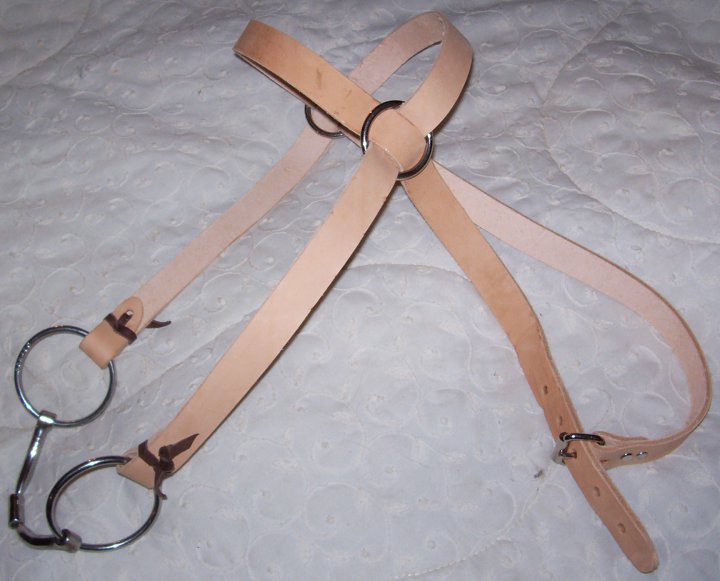
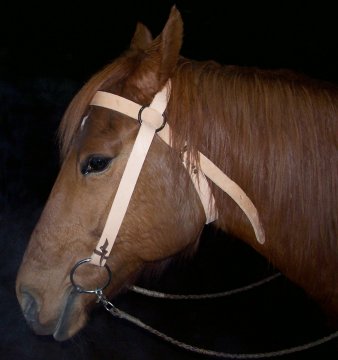
Here are pictures of the new bridle both alone and on Toby. As you can see, I made the throat latch a bit too long, but that is easy to fix. Just punch a few more holes and cut off the extra. Toby is saying, quit flashing me in the eyes and let me eat my dinner.
The next bridle in the series.
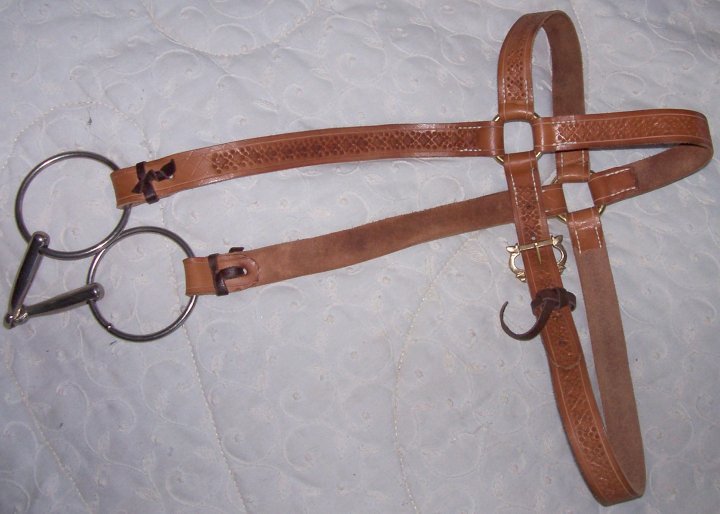
This one is similar to the woven one, but instead, the straps are all sewn to the rosette rings. For excellent leather sewing instructions, see Al Stohlman's book "The Art of Hand Sewing Leather" or for a less informative(but quicker to access) tutorial: Montana Leather Tutorial
This one is also stamped with two different leather stamps to make a decorative design. the finished bridle is natural colored, and simply rubbed with a compound of beeswax and oil.
Closeup of the stitched area around the rings. I have used a buckle from Marc de Gaulker's collection.
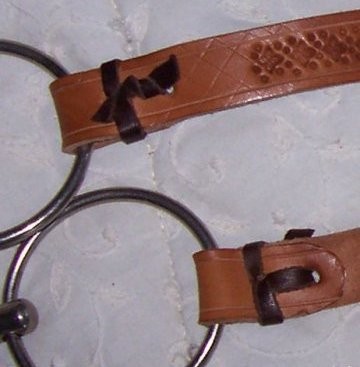
The bit ends showing how the bit is laced in.
Easy ways to make bridles look more medieval.
The first, easiest way to make a bridle look "medieval" is to change the brow band to an X or upside-down Y across the face.
Here is how to make an X, making a Y is similar:
Cut a strip of tooling leather 1 1/4" wide, and at least 18" long(how long will depend on the length of your horse's face). Mark a square in the center of the length that is 1 1/4" long. Adjust your leather stripper to 5/8" and strip each end just to the square. Dampen the leather and stretch it out into an X shape, while it is lying on a flat surface. Pat it completely flat. Leave it there till it dries. It will retain its shape when dry.
Put your bridle onto your horse, without a browband in place. Lay the X on the horse's face, and mark where the ends need to fold to attach to the bridle. It will attach on either side just above the bit and near the ears. Remove and fold, rivet, tie or stitch.
Another way is to scallop the edges of the leather. You can purchase strap end cutters in pointed, round, and other shapes, these make good scallops, or you can free hand cut them with scissors or a knife. You can scallop the edges of a bridle after it is made, or just scallop the straps and then make up the bridle.
In addition to the above, you can use leather stamps to tool designs into the leather, paint or dye to color your bridle to some bright shade, and attach various studs, spots, conchos or other metal thingies to decorate the surface. The Museum of London books and other resources show pictures of some actual period ornaments.
Looking at period bridles.
You will have to do some research to see just what sorts of bridles your personna might have used, remember they would probably have had different ones for different occasions. Just as we now have plain bridles for trail riding, and fancy ones for shows.
Here are a few pictures to get you started.
The ones I have chosen are arranged approximately by date, but it is not a comprehensive or scientific survey by any means. There is no subsititute for your own research!
I find that often the most interesting things are found as unimportant details of big "overview" paintings. Sometimes if the original is very small, scanning it and enlarging it on your computer will help bring out details you would otherwise miss.
Ebay of course is always a possibility. Search in "Crafts--Leatherworking" for basic leatherworking tools and leather. Some studs and bosses are also available there. If you just do a search for "conchos" or "conchas", you may find a bunch of interesting metal thingies that could work for your project. If you search for "bridle rosettes", you may find interesting and cool rosettes. There is also a fair selection from time to time of "medieval" or "re-enactor" stuff there and you might get period style buckles and bosses.
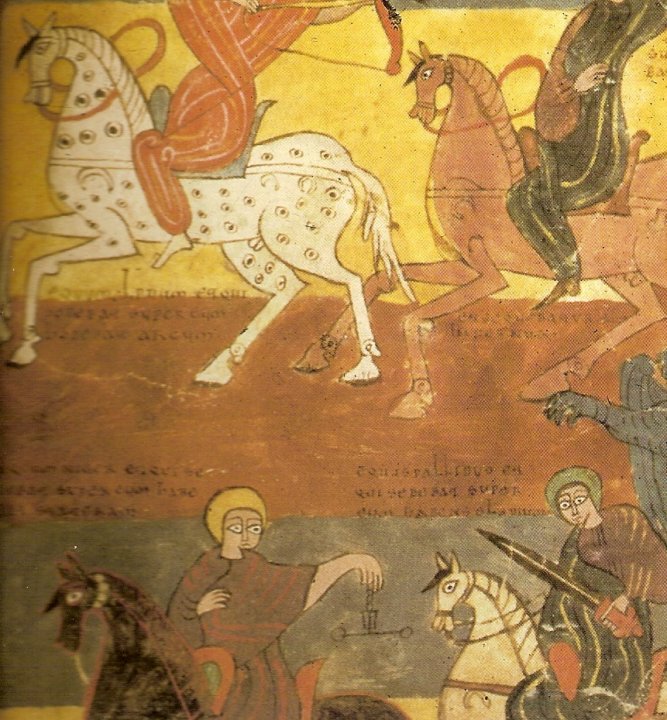
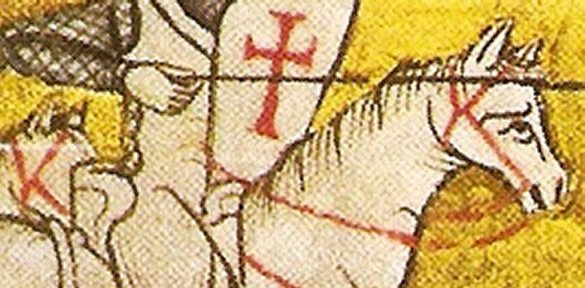
The Four Horsemen of the Apocalypse, around 980 Valladolid. These horses are apparently wearing nosebands and throatlatches only. I'm fairly sure this is artistic license and the artist is merely not showing the crown and cheek pieces. Of course if you want to try it, go for it!
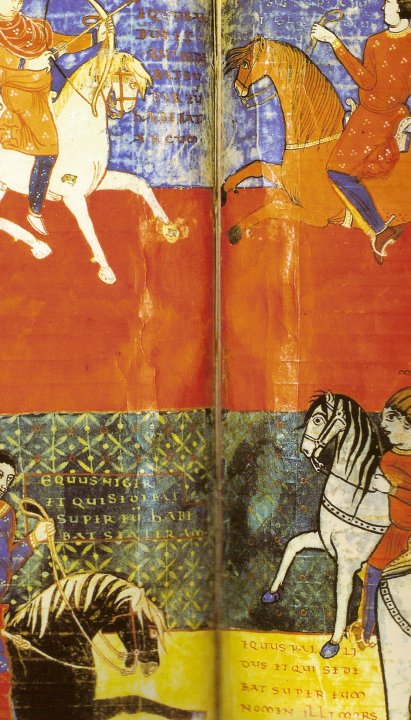
Apocalypse of St. Sever. Mid-eleventh century French. Three of these look like the basic browband running into the throatlatch bridle with nosebands. The red horse appears to be wearing a plain crownpiece bridle with a noseband.
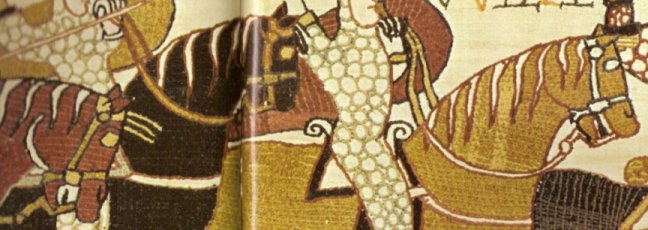
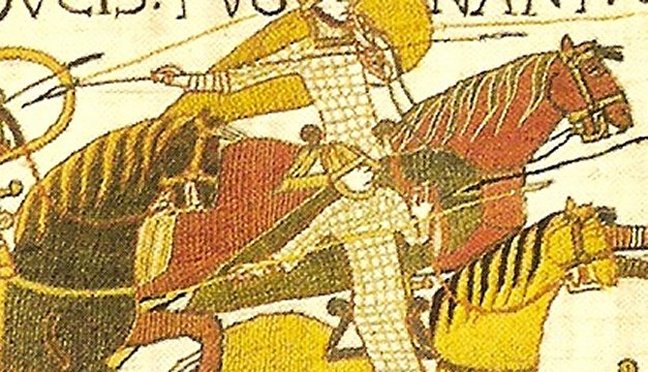
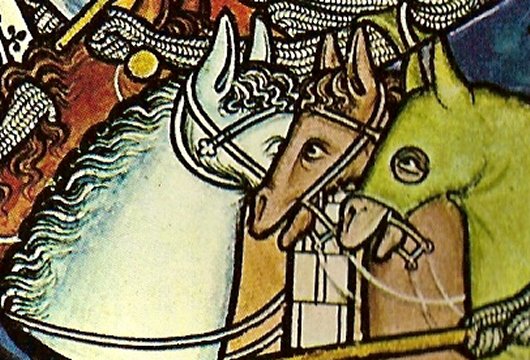
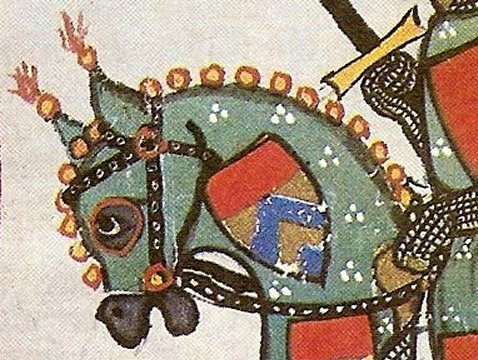
Two details from the Bayeaux Embroidery, showing various bridles. I do not think that you can document color precisely from the Bayeaux Embroidery, considering some of the horses are green and blue, but the basic shape of the bridle is there. They look very much like the modern bridle, minus the extra buckles, but also without the throat latch and sometimes the browband.
A detail from Collectar, St Bertin? 1170-80. A browband in line with the throatlatch bridle. Don't know if it is artistic license or not but the crownpiece and the cheek pieces do not line up. This could just be an artist's attempt to illustrate a ring or other attachment.
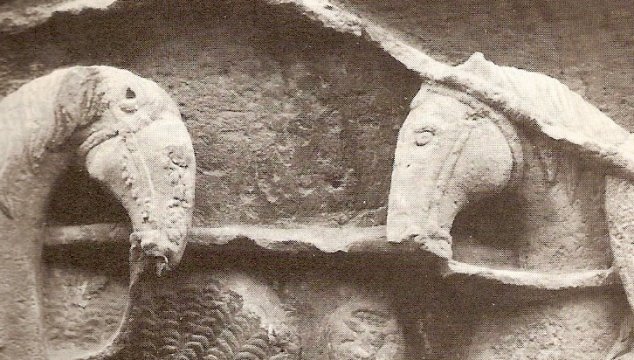
A detail of Roland fighting the Saracen Ferragut. From a capital from the palace of the Dukes of Navarre. The photo is undated but judging from the mail shirts and kite shields approximately "Norman" era. ca. 1000. They are the standard browband and throatlatch in one. The one on the right might possibly have a decoration on the browband. The one on the right also apparently has a curb strap.
A detail from the Bamberger Reiter, Bamberg Cathedral, on the north side of the George's Choir. Before 1237. This one is the browband connected to the throatlatch, with a ring at the junction, and what appear to be metal strap ends with hooks for connectors, and all four straps have rectangular studs.
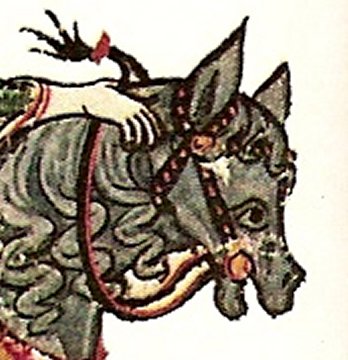
This is a detail of a scene from the bible painted in the 1200's. Note how the tan horse looks like it is wearing a bridle with the browband and throat latch in one, until you look at the grey horse next to it's bridle. The grey is wearing a browband bridle with a rosette, and a separate throat latch.
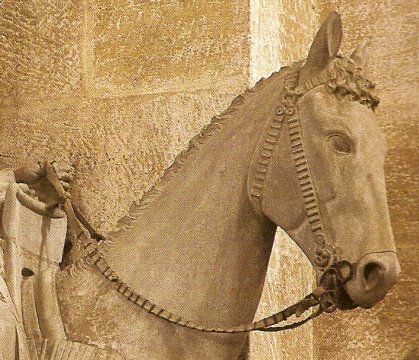
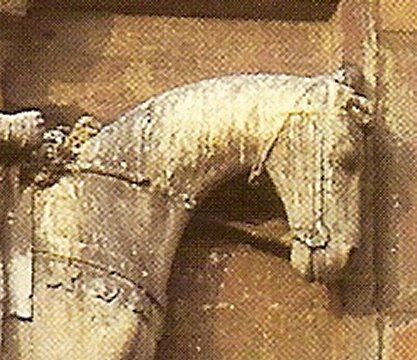
A detail from an equestrian statue from 1233, at the Palazzo della Ragione, Milan. This one has a separate crown piece and throatlatch, with the browband running past the crownpiece to connect the throatlatch.
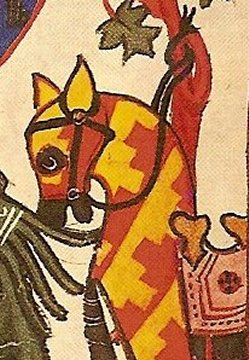
A detail from the Manesse Codex. This bridle looks like one of the "ear" variety. Note the use of rosettes and either studs or holes for decoration on the strapping.
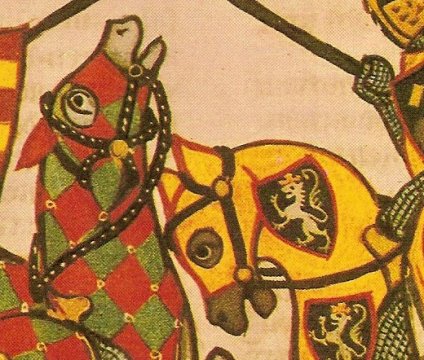
Walter von Klingen from the Manesse Codex. Two details of "eared" bridles, both with browbands, one without a throatlatch.
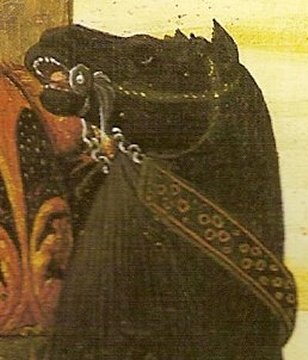
Detail from the Manesse Codex, 14th century, Ulrich von Lichtenstein, the two eared with browband version of the bridle with the throatlatch in line with the browband. this one is black with either studs, maybe with a jewel in the centers, or possibly eyelets.
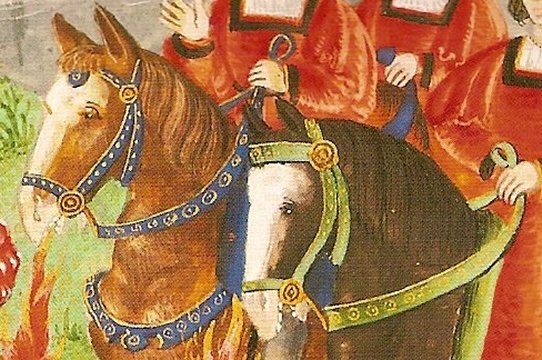
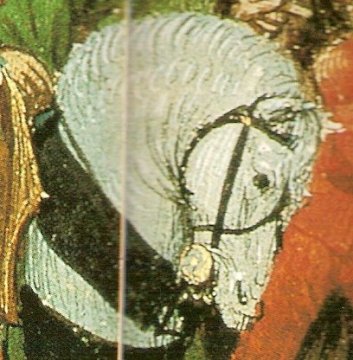
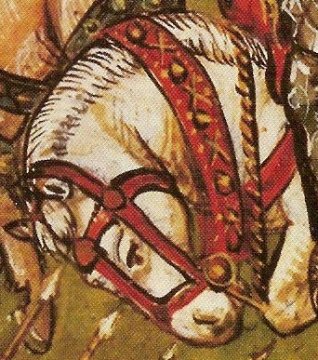
Two bridle details from Froissart's Chronicles. This particular scene records the battle of Crecy, but was painted at least 100 years after the fact. The red bridle on the grey horse appears to have a double hole buckle similar to a modern conway buckle in the place of a bridle rosette. It also shows the buckle on the throat latch. (on the offside) It also has a noseband and no browband. The blue bridle has a y-shaped forehead piece. These are actually used in modern bridles. They are used as an overcheck and to keep the bit in "up" in the mouth so the horse can't get their tongue over the bit.
Detail from Froissart's Chonicle, XV c. Another Y-shaped forehead piece on a plain white bridle with no throatlatch.
Detail from Froissart's Chonicle, XV c. This horse has a blue bridle with bosses or other decoration on the straps and the cheek pieces attach directly onto the throatlatch. It also has a noseband that appears to only cover the top of the nose. I think that the matching part under the nose, (in the curb strap position) is actually there, but is not very visible, being a chain.
Detail from The King of France sends the Heretics to the Stake, by Jean Fouquet, mid 1400's. This one appears to be a standard browband with throatlatch with the addition of a y-forehead piece. This forehead piece attaches to a curb strap rather than the bit. There is a bit of extra black paint behind the join of the crown piece and browband where the throat latch joins. this could be simply extra paint, or it could be a split strap end attaching to the crown piece in two places.
A detail from a 15th century Italian Cassone (painted chest). A nice view from under the chin of a curb strap on a fairly ordinary bridle.
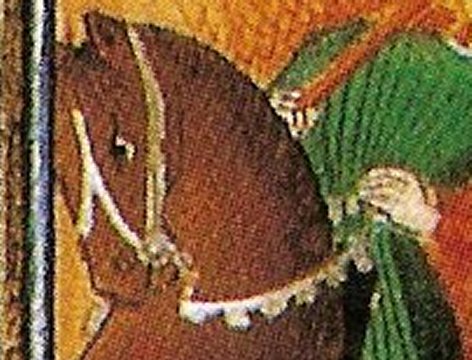
A detail from King Rene's Book of Love. The simplest of all bridles. Just a crown piece.
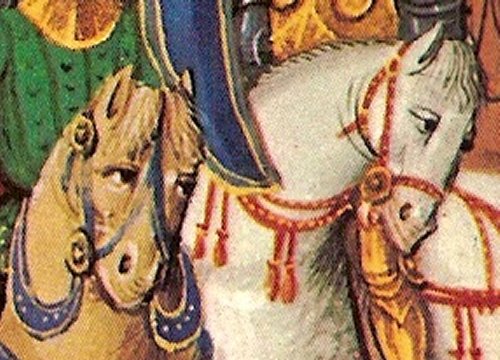
A detail from King Rene's treatise on tournaments. A nice variety of different styles. Note the big tassel on one horse's nose.
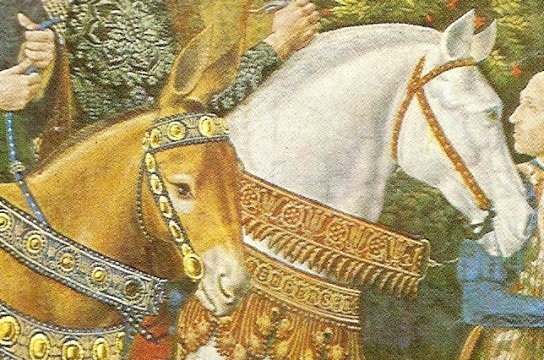
A detail from Journey of the Maji by Benozzo Gozzoli. Two simple bridles of the browband attached to throatlatch design. The red one is narrow straps with plain studs, but the blue one on the mule is extra special. It has a narrow throat latch, but much wider heavily decorated cheekpieces and browband.
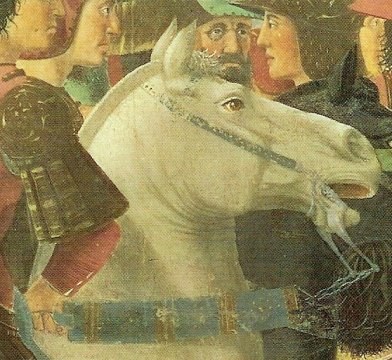
A detail from The Victory of Heraclius over Chosroes by Piero della Francesca. A fresco in Arezzo from about 1460. A relatively plain light blue browband bridle with no throatlatch
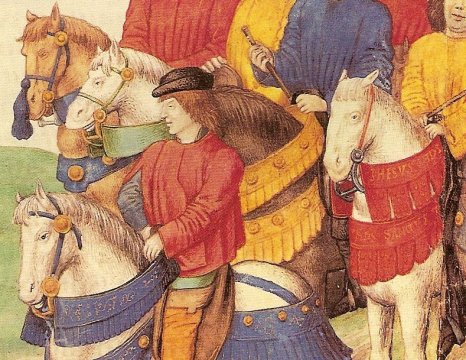
A detail of the Entry of Charles V into Bruges, flemish 1515. Two nice bridles with the browband and throatlatch running into each other. One is blue and one green each have bosses or studs on them with rosettes and the blue one also has a forehead decoration hanging below the browband.
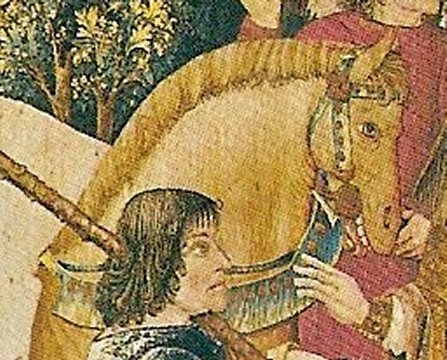
A detail from the sixth tapestry in the "Hunting of the Unicorn" about 1500. This one is a relatively simple one with the browband and throatlatch in one with a big bridle rosette over the join. It appears to be shaded white with gold colored studs. It also has a hook type strap end on the end of the crown piece attaching it to the bit.
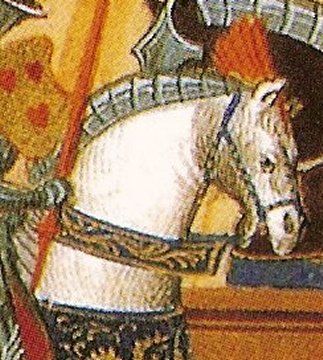
A detail from an annon. painting of the Battle of Grandson, 1476, painted in 1513. The "standard" browband running to the throat latch bridle with the addition of a noseband and strap down the center of the forehead from the browband to the noseband.
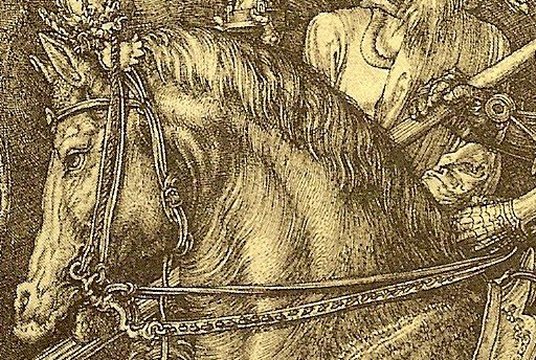
This one is a detail of Durer's Knight, Death and the Devil, from 1513. Durer and some of his contemporaries are wonderful in their attention to detail. This bridle has two crown pieces, has the reins set up "pelham" style and has a throat latch with a buckle showing. The browband runs across the forehead under the cheek pieces and back to the throatlatch without apparently being attached to the cheek pieces.
BIBLIOGRAPHY
The Age of Chivalry
A volume in the story of man library
Ed. Kenneth M. Setton
National Geographic Society 1969
Arms and Armour of the Medieval Knight
David Edge and John Miles Paddock
Crescent Books
New York, 1988
The Art of Hand Sewing Leather
Al Stohlman
Tandy Leather Co.
Fort Worth, 1977
Bit by Bit
Dianna R. Tuke
J.A.Allen and Co. Ltd.
London, 1991
Bits
Louis Taylor
Wilshire Book Co.
N. Hollywood, CA 1966
Bits and Bitting Manual
William G. Langdon, Jr.
Langdon Enterprises
Colbert, WA 1989
The Book of the 15th. Century
Carlos Alvarez Santalo
Anaya, Expo 92
Sevilla, Spain 1992
Discovering Harness and Saddlery
G.Tylden, Major
Shire Publications, Ltd.
Aylesbury, Bucks, UK 1979
Dress Accessories
Geoff Egan and Frances Pritchard
The Stationery Office
London, 1991
A History of Horsemanship
Charles Chenevix-Trench
Doubleday and Co. Inc.
Garden City, NY, 1970
The Horse in Medieval England
Herbert James Hewitt
J.A.Allen and Co. Ltd.
London, 1983
Horse Power
Juliet Clutton-Brock
Harvard University Press
Cambridge, MA, 1992
Horse Tack
The complete equipment guide for riding and driving
Ed. Julie Richardson
William Morrow and Co. Inc., London 1981
Horses and Horsemanship Through the Ages
Luigi Gianoli
Crown Publishers 1969
The Howell Book of Saddlery and Tack
Ed. Elwyn Hartley-Edwards
Howell Book House Inc.
New York, 1981
The Lady and the Unicorn
Sutherland Lyall
Parkstone Press Ltd.
London, 2000
The Life, History and Magic of the Horse.
Donald Braider
Madison Square Press
Grosset & Dunlap, Publishers
New York, 1973
Knives and Scabbards
J. Cowgill, M. de Neergaard, N. Griffiths
The Boydell Press
London, 1987, 2000
Know All About Tack
George Dulaney
The Farnam Horse Library
Omaha, NB, 1974
Making and Repairing Western Saddles
Dave Jones
Arco Publishing, Inc.
New York, 1982
The Medieval Horse and its Equipment
c. 1150-c.1450
ed. John Clark
Museum of London, London, 1995
Medieval Pageant
Bryan Holme
Thames and Hudson
London, 1987
The Medieval Warhorse
R.H.C.Davis
Thames and Husdson
London, 1989
The Pictorial Arts of the West 800-1200
C.R. Dodwell
Yale University Press
New Haven & London, 1993
Princely Feasts and Festivals
Bryan Holme
Thames and Hudson
London, 1988
The Reign of Chivalry
Richard Barber
St. Martin's Press
New York 1980
Saddles
Russel H. Beatie
University of Oklahoma Press
Norman & London, 1981
Saddlery
E.Hartley Edwards
J.A.Allen and Co. Ltd.
London, 1987
To Handmake a Saddle
J.H.L.Shields
J.A.Allen and Co.
London, 1983
Tournaments
Richard Barber & Juliet Barker
Weidenfeld & Nicolson
New York 1989
Where do I find some of this stuff???
Tandy Leather and The Leather Factory are sources both online at www.tandyleather.com and at local stores if you happen to have one near you. They have a decent selection of leather, every tool you will need for stitching and tooling leather and a fair selection of basic buckles and some conchos. They also have books and "craftool patterns" which can guide you though the intricacies of tooling leather.
Don't forget to look in the phone book for leather stores near you. I always encourage folks to shop locally if possible. Support your local economy!
Check at big SCA events for merchants of little pewter and brass thingies. They often have buckles and bosses and other things that will work.
Here are a couple SCA and Re-enactor merchants that have websites.
Treasure Cast
Gaukler Medieval Wares
If you look through all the Museum of London books,(and any other book on medieval digs that you can find) you will find many little metal thingies that could have been used on horse tack. A strap that is broken on both ends might be a rein or a belt or. . .Copyright 2005 Lynda Fjellman
Home Email me Top of Page
